New Recipes Available!

21 Jan

I’ve got some awesome posts available at my new blog. Check these out and subscribe to Decadent Dragon Bakery:

Salted Caramel Hot Chocolate

Salted Caramel Drinking Chocolate

Salted Caramel Hot Chocolate

Winter Fancy Food Show in SF

NASFT Fancy Food Show

Winter Fancy Food Show 2013

Martha Stewart’s Fish Cake

Martha's Fish Cake

Martha Stewart’s Fish Cake

Vegan Chocolate Cupcakes

Best Vegan Cupcakes

Vegan Chocolate Cupcakes

Future Blog Posts @ www.decadentdragonbakery.com

I hope to see you there!

Beth

New Blog Site & Tiramisu

23 Dec

Hi Everyone –

I’m migrating my blog to a new site and I’d like you to come visit me! My newest post – Chocolate Tiramisu – is available exclusively at my new page.

Future Blog Posts @ 

www.decadentdragonbakery.com

Tiramisu Slice

Please click on the link above to check out my new site. You can also subscribe to future posts by entering your email address in the sidebar of my new blog.

See you there!

Beth

Tiramisu: Baking Ladyfingers

22 Dec

Baked LadyfingersThese cute little Ladyfinger Cookies are simple to make, delicious dipped into a cup of your favorite tea or as the base of creamy Italian Tiramisu.

When I made Chocolate Tiramisu last week, I decided to make my own ladyfinger cookies instead of buying them. The store-bought variety, while perfectly serviceable, just aren’t as good as making your own. Besides, it’s great to say you made something 100% from scratch, isn’t it?

For this recipe, you’ll need a few *special* ingredients that you may not have in your home kitchen: cake flour, cream of tartar (powder) and a piping bag/tip…in addition to a few others.

And stay tuned on a terrific use for these cookies…I’ll be posting my favorite Chocolate Tiramisu Recipe soon.

Ladyfinger Ingredients

Ladyfinger Cookie Recipe

Prep Time: 30 minutes | Bake Time: 8-10 minutes (until firm/lightly browned)
Oven Temp: 350 F
Makes 3 dozen 3-inch cookies | Adapted from Joy of Baking

1/2 cup Cake Flour
3 Egg Yolks, room temperature
2 tbsp White Sugar
1/2 tsp Vanilla Extract
3 Egg Whites, room temperature
1/8 tsp Cream of Tartar
3 tbsp White Sugar
Powdered Sugar for dusting unbaked cookies

Pre-heat the oven to 350F. Line two (2) baking sheets with parchment paper. [Silpats will work, but I discovered parchment makes removing the cookies easier after baking.]

Use a ruler to divide the parchment into three (3) rows. This will help you pipe evenly sized 3-inch cookies.  Fit your pastry bag with a 1/2 inch round tip. [In a pinch, you can probably use a gallon zip-lock bag with a small cut in one corner.]

Get all your ingredients measured and ready so they are close at hand.

Preparing Egg Yolks
In an electric mixer with your paddle attachment, beat egg yolks and 2 tbsp white sugar on high for ~5 minutes. The mixture should form a ribbon when batter falls off the beaters back into the mixture. Egg yolks will be thick and pale yellow. Mix in the vanilla extract. Sift the cake flour lightly over the batter but don’t fold in.

Ladyfingers Flour and Egg

Preparing Egg Whites
In a clean bowl, whip the egg whites using your whisk attachment until foamy. Add the cream of tartar and beat to soft peaks. Slowly add in the 3 tbsp of white sugar and whip until stiff peaks form and egg whites are glossy.

Fold the whites into the yolk mixture in three (3) additions, mixing until just incorporated.

Ladyfinger Batter

Ladyfinger Batter Mixed

Transfer your batter into your pastry bag. Hold the bag at a 45-degree angel to the baking sheet and pipe the batter to form 3-inch ladyfingers. Leave about an inch between cookies. [My batter was fairly thin and it took a few tries to pipe an even ladyfinger. You’ll get the hang of it!]

Ladyfingers on SheetAfter you’ve finished piping your cookies, sift powdered sugar lightly over the tops of the ladyfinger cookies.

Bake your cookies 8-10 minutes until the ladyfingers are firm, lightly browned and still spongy in texture.

Take the baking sheets out of the oven and slide the parchment paper from your pans onto wire cooling racks. Let the cookies cool for a few minutes and then use a thin spatula to separate the cookies from the paper. [Don’t forget to do this or they will stick!]

Let the cookies cool completely. Store in a sealed container for 1-2 days or freeze for longer storage.

Lychee Ombre Rose Cake

12 Dec

Lychee Ombre Rose Cake Close Up FINAL

I just finished a fun project: the Lychee Ombre Rose Cake.

A friend and former work colleague celebrated her little one’s baptism this weekend. I was honored when she asked me to make a rose cake for the event, after seeing my first attempt back in October.

Ombre Rose Cake Top

With all the fuss putting this cake together, I didn’t get as many photos as I would have preferred. But I wanted to share the experience with you, and what I learned.

This is a crowd-sourced cake. This cake could not have been accomplished without the help of fellow food lovers. I took inspiration from many sources as I designed this cake over the past month.

I experimented with numerous cake recipes, and at least six (6) types of buttercream. [There will be a separate post on buttercream, I promise you.] Although I did modify many of them, the recipes below stood out. They are solid recipes you can trust to perform.

White Cake : Thanks to SprinkleBakes for a moist White Cake Recipe!
Swiss Meringue Buttercream: Great SMB recipe from Smitten Kitchen
Lychee Filling: Adapted this Lychee Mousse filling from Raspberri Cupcakes
Color Styling: Inspired by 52 Kitchen Adventures‘ similar ombre version

All told, I probably spent five hours on this final cake. You can’t rush genius.

Baking the cakes, whisking fluffy Swiss Buttercream in my little mixer, whipping up lychee mousse and tinkering until I found the perfect color of pink. It takes time, people!

Frosting ColorsRose pink, petal pink, burgundy, red…so many options for pink.

Once I had all the requisite cake components, I was ready to build my Lychee Ombre Rose Cake! You can see there are quite a few tools you’ll want close at hand.

Rose Cake ToolsLet me know if you are curious about any of these tools. A cake turntable is really nice to have. The wax paper is simply to protect the cardboard round from being stained by the buttercream.

Filling the Ombre Rose CakeTorting and filling the cake. Make sure you pipe a dam of frosting to hold in the mousse filling – or you may experience ooze.

Ombre Rose Cake Crumb Coat

I applied an ombre pink crumb coat (dark to light). I didn’t worry about the crumbs visible in this icing since I was just going to cover it all over with roses.Ombre Rose Cake Crumb Coat Finished

I really like the effect. Perhaps I’ll do a simple cake this way in the future. [Note: this is prior to smoothing the frosting…which is why it looks a tad lopsided.]

Iced Cake Before Gold TintThe photo above is before I applied the gold tint. I used the Wilton Gold spray tint to airbrush the cake.

Pink and Gold Ombre Rose Cake with TintThe gold airbrush gives the cake an iridescent glow.

Lychee Ombre Rose Cake

My “Learnings” [Don’t make my mistakes!]

  • Don’t Bother with American Buttercream. Just don’t. NO Crisco either. Use Swiss Meringue Buttercream. It’s so much better.
  • Make a LOT of frosting. For this cake, you will need a lot of frosting, particularly for icing the top layer of roses. I almost ran out of the lightest pink icing. Reserve some uncolored icing for emergencies.
  • Keep your icing cool. The rose consistency changes as you ice and warm the icing in the bag. So take breaks and briefly chill the icing to avoid this.
  • Deliver your own cakes. I heard the cake encountered some smudging during transportation. Next time I’ll deliver or find a surefire way to keep the cake from moving. [One good suggestion is museum putty.]

Each time I make this style of cake, I get a little better at it. Still plenty of things to learn and improve upon. 10,000 hour rule, right?

Overall, I really appreciate my friend taking a chance on me as a newbie baker. And I hope you take a chance on yourself and make this cake, too!

– Beth

Raspberry Fudge Cookies

4 Dec

Raspberry Tower (2)

These may be the best cookies I’ve ever made. My Raspberry Fudge Cookies are packed with Guittard chocolate, rich espresso and tart raspberries.

Raspberry Fudge Cookie I love you

Innovation in my kitchen often comes from a mistake, or starting a recipe and realizing I don’t have a key ingredient.

In this case, I was originally going to share a different cookie recipe with you (another time, perhaps). But I burned the pecans I was going to use. Plans changed. No biggie: you’re going to LOVE these, I promise.

Raspberry Fudge Cookies have made it to the top of my list. My husband wants you all to know he enjoys eating the dough raw. But officially Decadent Dragon Bakery can’t condone that!  [To me, a freshly baked cookie tastes like a molten lava cake. So good!]

Both the Guittard chocolate and raspberries are locally sourced from businesses in the Bay Area.

Raspberry Fudge Cookies

Prep Time: 30 minutes | Bake Time: 12-14 minutes (until just set)
Oven Temp: 325 F

1 lb Bittersweet Chocolate (high-quality is best, chopped finely)
1/2 cup Butter
3/4 cup All-Purpose Flour
1/2 tsp Baking Powder
1/2 tsp Salt (ideally, Kosher – use less if using table salt)
1 &  1/4 cups Sugar
4 Eggs (large, at room temperature)
2 tbsp Instant Espresso Powder
1 tbsp Vanilla Extract
1 pint Fresh Raspberries (frozen is probably OK in a pinch)

Pre-heat your oven to 325F. Line your baking sheets with silicone liners or parchment paper (you’ll need 4 pans if baking all cookie at once).

Guittard Chocolate

Begin by weighing and chopping your bittersweet chocolate into even, small pieces. This will help it melt evenly. Place the butter and chocolate into a medium-sized pot and turn the stove on medium-low. Slowly stir the chocolate until melted. Be careful to stir often to avoid burning the chocolate. Remove from heat and let cool for a few minutes.

Chocolate and Butter

Chocolate + Butter 2

Chocolate + Butter 3

See? The chocolate is nice and creamy when fully melted.

In a medium-sized bowl, combine your flour, baking soda and salt. Stir until fully mixed.

Eggs in Mixing Bowl 2

Next, crack your eggs into a large bowl (or bowl of your stand mixer fitted with the paddle attachment). Beat for 30 seconds. Add your sugar, instant espresso powder and vanilla extract. Beat for 1-2 minutes until fully combined and foamy. Your mixture should look like this:

Eggs Sugar Espresso

Grab your cooled chocolate (make sure it isn’t too hot, it should be barely warm to the touch). Beat the chocolate into the egg mixture.

Chocolate Added

Add in the flour mixture and mix until just combined. Stir in your raspberries by hand with a large spoon or spatula.

Chocolate and Flour

I loved the pattern created by mixing flour into the chocolate.

It’s time to scoop some cookies! Use about 3 tbsp of dough for each cookie. [If you have a medium sized ice cream scoop with a release handle, this works really well to form the dough.] These cookies spread out, so I recommend no more than six (6) per cookie sheet. Place into your hot oven and bake around 12-14 minutes (the center of the cookies should still be quite fudgy and moist).

Raspberry Fudge Cookies on Sheet

Don’t place them this close together (only if freezing for later).

Once the cookies are out of the oven, you can transfer them to a cooling rack with a spatula (don’t pick them up by hand when warm as they’ll fall apart).

Raspberry Fudge Cookies with Powdered Sugar

These cookies really are awesome the day they are baked, so make them fresh!

Tip: If you have space in your freezer, you can scoop these cookies onto a baking sheet and freeze them for 1-2 hours.  Since they don’t need room to spread out, you can fit ~24 on one sheet. Once they are fully frozen, place cookies into a zip-lock freezer bag. You’ll be able to bake them up fresh just a couple at a time! No need to defrost before baking, but they’ll probably take a few extra minutes to finish.

I hope you enjoy them! Do you have an awesome recipe that arose from a kitchen snafu? Let us know about it in the comments!

– Beth

French Silk Pie

29 Nov

I did an absolute ton of baking for Thanksgiving! I even made this French Silk Pie twice. A family recipe, this pie is silky smooth with robust chocolate flavor.

For me, Thanksgiving is typically a week-long affair. And this Thanksgiving did not disappoint. There were multiple family events throughout the week — a surprise birthday party, mini crab-feed, T-Day (with no T, actually) and a post-Thanksgiving-dinner dinner. So it was easy to whip up a few of my favorite desserts!

It’s difficult to photograph food when you have guests salivating behind you. They just don’t appreciate that you need a few minutes alone with the holiday pie! While I appreciate artistry in my food, I don’t think anyone wants to eat a piece of art. Too destructive, too many guilty feelings.

That’s why I love ugly food.

It’s the food we were all raised on. I think of how my Grandma and I enjoyed gooey hot fudge sundaes together.

Ugly food is over-the-top and messy. It tastes like childhood. And that’s what this French Silk Pie tastes like to me.

Random Fact: Incidentally, my first word was “Cookie.” [Thanks, Grandma!]

Making this pie is really easy. This is adapted from my mother-in-law’s amazing recipe. You may know this pie as Chocolate Satin instead of French Silk.

Please be aware, this French Silk Pie does contain raw eggs, which are unsafe for some groups of people. Try a different pie if you are pregnant, have a compromised immune system or feeding young children. Or, if you can find pasteurized whole eggs, that would work!

French Silk Pie
Prep Time: 30 minutes (needs to chill for at least 4 hours)
Makes 1 Pie

1 Pre-made Chocolate Pie Crust (or make your own HERE)
1 cup / 2 sticks Butter (room temperature)
1.5 cups White Sugar
4 oz Bittersweet Chocolate (I used Guittard) OR 2 oz Unsweetened Bakers Chocolate
4 Eggs (fresh and uncracked)
2 tsp Vanilla Extract
1/8 tsp Kosher Salt
Whipped Cream for Topping
Oreos or Shaved Chocolate for Topping (optional, have fun with it!)

Begin by preparing your chocolate pie crust. Once prepared, chill the crust in the fridge or freezer.

Next, chop up your chocolate and microwave in 15 second intervals until fully melted, stirring after each interval. Set aside and let cool.

Add your softened butter to the bowl of your stand mixer or large mixing bowl. Cream the butter on medium until lightened, about 1-2 minutes. Slowly add your sugar while beating on medium speed. Beat butter and sugar mixture until fluffy, about 2 minutes.

Add vanilla extract, salt and cooled chocolate mixture to mixing bowl. Beat the mixture until combined. Make sure to scrape the bowl thoroughly. (Any uncombined ingredients will leave streaks in your finished pie.) Your mixture will look something like this:

Now, the fun part (and the reason a stand mixer makes your life easier). You are going to add your first two (2) eggs, and beat the mixture on medium-high speed for five (5) minutes. Scrape periodically. After 5 minutes, your mixture will look something like this:

Go ahead and add the final two (2) eggs, and beat the mixture on medium-high speed for five (5) more minutes. Continue to scrape the bowl periodically to ensure everything is evenly mixed. You’ll end up with a smooth, mousse-like mixture.

After you’ve finished mixing, pour the mixture into your chilled pie crust. Smooth out the filling with a spatula. Refrigerate for at least four (4) hours. Lick the mixing bowl and spatula thoroughly.

Once the pie is thoroughly chilled, cover with whipped cream and any topping of your choice. Served well chilled.

Where’s the other slice, you ask? The husband got to it!

I know you’ll love this pie, especially if you enjoyed my Grasshopper Pie post. This pie is a down-to-earth dessert, just waiting to become your holiday tradition. I hope you enjoy it!

Do you have an ugly food recipe that you love, too? Tell me about it in the comments!

– Beth

Homemade Food Act a Big Win for Small Bakers in CA

27 Nov

Food entrepreneurs have a reason to celebrate this holiday season!

The California legislature recently passed Assembly Bill 1616, California’s first Cottage Food Law, which legalizes home-based food operations in limited circumstances.

For small time bakers, this is a huge win! Much of the cost of starting a food business comes from obtaining permits and leasing commercial kitchen space for baking your products legally. This bill attempts to lower the barriers to entry and – fingers crossed – may help stimulate small business growth in the state.

Let’s examine this bill in a little more depth together. My analysis comes directly from the text of AB1616.

When is this Law Effective?
The provisions of this bill become effective January 1, 2013. (However, regulators have indicated they may need additional time to comply.)

Defining a “Cottage Food Operation” (CFO)
This bill amends the Health and Safety Code to call out a “Cottage Food Operation” as a distinct entity from “Food Processing Facilities” and their more rigorous safety requirements.

Business Structure
The bill defines two distinct categories of Cottage Food Operations (CFOs):

Class A – a “Class A” CFO may only sell directly to consumer. Eligible sales are limited to farmer’s markets, bake sales, holiday bazaars, in-person transactions.

Class B – a “Class B” CFO may sell both directly and indirectly to consumers. Those with Class B status can have their products sold at third-party retailers (like a grocery store) and to restaurants for immediate consumption. This is in addition to selling products directly to consumers.

Note: It appears counties may have the right to allow / disallow indirect food sales from other counties. We’ll see how that sorts itself out.

Business Income Limitations
Since this bill is geared towards stimulating small business, it puts gross annual sales caps on the Cottage Food Operation.

2013: $35,000
2014: $45,000
2015: $50,000

Businesses which exceed the cap will need to comply with existing regulations for commercial food production.

Business Size
A CFO may have one full-time equivalent employee, in addition to the Cottage Food Operator. Family or household members are not included in this count, so they can be enlisted to help.

Permitting Process
Direct enforcement, will likely come from our local County Health Department. However, the California Department of Public Health is charged with outlining and overseeing this enforcement statewide. We’ll see how it all shakes out.

Class A cottage food operations will need to register with their local enforcement agency and complete a self-certification checklist prior to opening for business. Inspections of Class A operations will only occur if warranted by a consumer complaint.

Class B cottage food operations will need to meet the above requirements and also obtain a permit from their local enforcement agency. This will include passing an initial site inspection by an enforcement officer. Class B inspections will occur annually thereafter.

All Cottage Food Operators and employees will need to pass a food processor course instructed by the California Department of Public Health.

Permitting costs and regulatory fees may not exceed the reasonable costs incurred by local enforcement agencies. There may be additional permits required for operating at specific venues or within your geographic area.

Labeling Requirements
The Cottage Food Operation must comply with FDA labeling requirements. In addition, labels must include the following:

  • Name of the Food Product
  • Name of the Cottage Food Operation
  • Class A: Registration/Permit number of the Cottage Food Operation
  • Class B: Permit number and the name of the county that issued the permit
  • Words “Made in a Home Kitchen” in 12-point font on the primary display panel
  • Ingredients in descending order by weight
  • Products sold without packaging (in a restaurant) must be labeled as ‘Homemade on the men

Operational Requirements
Most of these requirements are no-nonsense, and meant to keep food prepared safe for the consumer.

  • No domestic activities may occur in the kitchen during cottage food preparation
  • No infants, children or pets may be in the kitchen during cottage food preparation
  • Kitchen equipment must be clean and in a good state of repair
  • Anything in contact with food must be cleaned and sanitized prior to use
  • No rodents or insects in the kitchen or food storage areas
  • Smoking is prohibited in the kitchen during cottage food preparation
  • Employees with contagious illnesses must refrain from working
  • Employees must wash their hands properly
  • Water used must be potable

Eligible Foods
Only foods classified as “not potentially hazardous” may be produced by a Cottage Food Operation. This is to limit the risk of contamination to the consumer. A list of these foods is to be maintained by the California Department of Public Health. The initial list includes:

  1. Baked goods without cream, custard, or meat fillings, such as breads, biscuits, churros, cookies, pastries, and tortillas.
  2. Candy, such as brittle and toffee.
  3. Chocolate-covered nonperishable foods, such as nuts and dried fruit.
  4. Dried fruit.
  5. Dried pasta.
  6. Dry baking mixes.
  7. Fruit pies, fruit empanadas, and fruit tamales.
  8. Granola, cereals, and trail mixes.
  9. Herb blends and dried mole paste.
  10. Honey and sweet sorghum syrup.
  11. Jams, jellies, preserves, and fruit butter that comply with the standard described in Part 150 of Title 21 of the Code of Federal Regulations.
  12. Nut mixes and nut butters.
  13. Popcorn.
  14. Vinegar and mustard.
  15. Roasted coffee and dried tea.
  16. Waffle cones and pizelles.

Resources
FAQ Provided by CCDEH
Text of Assembly Bill 1616
FDA Food Labeling Requirements
Santa Clara Dept of Environmental Health, Food Safety Program (for my local readers)

My Takeaways
Keep in mind I’m not an expert. The analysis above is just my two cents. Overall, this law is a net positive for talented food entrepreneurs with more limited resources.

This new law may also bring current black-market operations into the fold.  The revenue generated for the state is a no-brainer. And the limitations protect both existing commercial food operations and the consumer through income caps and exempted higher-risk food categories.

One thing’s for sure: the home food industry is about to get busy in California! If you think it may be for you, I recommend contacting your local county health department for additional information. And keeping checking back here for detailed updates!

– Beth

Tacky Christmas Sweater Party Cookies

21 Nov

My new friends at Empire Vintage in Palo Alto are hosting a Tacky Sweater Party this evening, complete with a DIY-photo booth, hot cocoa and lots of mini cookies provided by Decadent Dragon Bakery. Yay – that’s me!

I was thrilled to get Empire Vintage’s call for goodies for their party. Ugly Sweater parties are this new phenomenon embracing the tacky holiday sweater. Or maybe it’s just an excuse to have another party and hit the egg nog? Either way, Empire Vintage has got you covered!

For the party, Empire Vintage was looking for mini holiday-themed goodies. Below are some photos of what we provided.

Peppermint Cupcake Bites

Spicy Gingersnap Bites

Chocolate Chunk Brownie Bites

*Konjakransar* Sugar Cookies

Our *Infamous* Vanilla Bean Chocolate Chunk Cookies

You’ll be seeing a number of these recipes on the blog (once I get to them). For now, you can stop by Empire tonight and enjoy the treats and awesome clothing! If I get my hands on some, I’ll post photos of the event. (I did, see below!) Good luck, Empire Vintage!

Update: Empire Vintage let me know the party went very well! Below are a couple photos from the party.

– Beth

Minty Grasshopper Pie

18 Nov


A homemade spin on this classic freezer pie.  Decadent Dragon’s Grasshopper Pie uses homemade marshmallow cream, creme de menthe and creme de cacao liqueur. Smooth, rich and minty.

Growing up, my sister’s favorite birthday cake was a Grasshopper Pie from Baskin Robbins. This Grasshopper Pie is a little different – it uses freshly whipped marshmallow cream instead of ice cream. But I think you’ll find its silken texture and flavor make for a great grown-up version.

When you find yourself with a bunch of extra egg whites, like I did after making my Holiday Egg Nog Grog, this is a perfect pie to use them up.

On the whole, this pie is straightforward to make but there are some bad recipes floating on the internet, so beware! As I found with my first attempts, freezer pies are extremely sensitive to water content. Ice crystals ruin the texture of this pie. Think ice cream instead of “icee.”

Alright, this recipe involves two parts: first, we need to make our homemade Marshmallow Cream. Then, we need to combine it with our minty pie ingredients.

Part 1: Whip up your Marshmallow Cream. This will be the base to your lovely Grasshopper Pie.

Marshmallow Cream
Recipe from Bon Appetit
Makes 4 cups

3/4 cup + 1/4 cup Sugar (divided)
1/4 cup Water
4 Egg Whites
1 tsp Vanilla Extract
Pinch of Salt

Combine 3/4 cup of the sugar and 1/4 cup water in a small saucepan over medium-high heat. Attach a candy thermometer to the side of the pan and simmer the syrup without stirring until it reaches 240F. You can occasionally swirl the pan gently but no stirring with a spoon, please! Stirring with a utensil can cause crystallization.

While the sugar syrup is cooking (be sure to monitor it closely), you can prepare the eggs.  Carefully separate the eggs, making sure no yolk gets into your egg whites. Reserve the egg yolks for another use [like my Holiday Egg Nog Grog]. Add the egg whites, vanilla and salt into the bowl of your stand mixer, fitted with the whisk attachment. Whip on high until the eggs are frothy. Slowly begin adding the 1/4 cup sugar. Whip until medium peaks form. Reduce speed to medium, then carefully pour hot syrup into egg mixture in a slow, steady stream while whipping. Increase mixer speed to high and whip to stiff peaks. Reduce speed to medium and whip until marshmallow cream is cool. Use immediately.

Random Fact: My husband detests peppermint. So much that he uses kid’s strawberry toothpaste. 

Alrighty, on to pie-making!

Part 2: Let’s freeze us some Grasshopper Pie. The key to a silky pie is fully mixed and COLD ingredients.

Grasshopper Pie
Makes 1 Pie

1 Pre-made Chocolate Pie Crust (or make your own HERE)
4 cups Marshmallow Cream
1 cup + 3 tbsp Heavy Whipping Cream (divided)
1-2 tbsp Creme de Menthe
1-2 tbsp Creme de Cacao
2-4 drops Green Food Dye (Optional)
Sweetened Whipped Cream for topping (Optional)
Crushed Andes Mints or Oreos for topping (Optional)

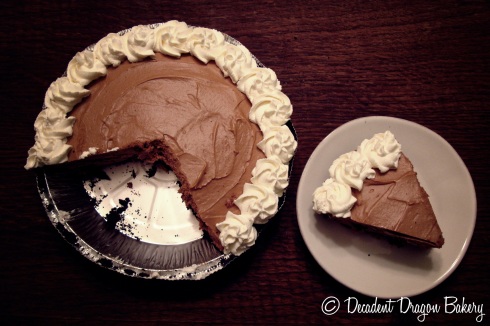
Start by pre-chilling your Chocolate Pie Crust. Next, take your Marshmallow Cream and combine with 3 tbsp of heavy cream. Stir to combine until mixture is smooth (if you need to, you can microwave or heat the mixture gently to help with melting the marshmallow). Stir in 2 drops of the food dye until uniform. Chill the mixture in the fridge or freezer while you beat the cream.

Take the remaining 1 cup of heavy cream and 2 more drops of food dye and whip until medium peaks form. You want structure but don’t over-beat and make butter!

Gently fold in the whipped cream to the marshmallow mixture. Add liqueurs to taste [don’t add too much as you don’t want your pie to be icy]. Gently scrape the mixture into your chilled pie crust. Pop immediately into the freezer for 4-6 hours.

While impatiently waiting for your pie to freeze, make yourself a Grasshopper martini like I did. Truly decadent!

Just prior to serving, you can whip some cream to frost the pie. I used a Fat Daddio Pastry Bag and Wilton 4B Open-star tip to pipe my whipping cream.

If you have Andes mints or oreos, you can top the pie with them for artistic effect.

And now…the big reveal.

Ta-daaah!

[Wait, did I already show you that photo? Oh well, here it is again.]Remember, the liqueur in this pie means the melting point is higher and it never fully freezes [you can see how fast it melts in the shot below]. So, keep it cold and eat it quickly!

The Takeaway: You don’t have to use my recipe but be on the lookout for freezer pies with lower fat ingredients or too much liquid (water, liqueur, milk, etc.). My first attempt at this pie included regular milk and a lot more creme de menthe/cacao. All that liquid added up to a slushy pie. By limiting the liquid and upping the fat content you’ll get a much smoother result. Good luck!

Beth

Holiday Egg Nog

15 Nov

The quintessential holiday beverage. Egg Nog has seen many an amateur cook through endless hours spent slaving over a holiday meal. It’s smoothed the edges on those awkward dinners with the extended family that drag on-and-on. It’s perfect for sipping with friends and family in front of a warm, crackly, fire.

I still remember the first time I sampled homemade Egg Nog. My neighbors hosted a holiday cookie swap. I was probably 13 years old. And there was this huge punch bowl of warm Egg Nog. All the adults were doing boring things like talking to each other. So I fixated on the Nog. I must have had at least four cups full. Far more than was polite. But it was just that good, I couldn’t help going back for more.

I’ve decided to unofficially call my recipe “Egg Grog” because it’s made with good quality Jamaican rum. [Egg Grog.  The more you drink, the more you feel like a pirate.] But names aside, I think you’ll enjoy it.

I can’t stand store bought egg nog.  To me, it tastes like bubblegum, which I have no interest in drinking.  But that’s OK because this is one beverage that’s simple to make, and customize to your tastes, at home.

This drink can be served warm or chilled. It’s best the next day, though mine rarely makes it that long. If you haven’t tried homemade Egg Nog before, give this one a try – I promise, you won’t go back!

Holiday Egg Nog
Recipe makes 10-12 cups

8 Egg Yolks
2/3 cup Sugar
4 cups Milk (I used 2%)
2 cups Heavy Cream
8 tbsp Dark Rum (Bourbon or Cognac make good substitutes)
2 tsp Freshly Grated Nutmeg (the regular stuff will work, too)
Pinch of Salt

Separate egg yolks from whites. Reserve egg whites for another use. Place yolks in a medium bowl and beat with an electric mixer until egg yolks have lightened in color (about 30 seconds). Slowly add in the sugar, beating until lightened and fluffy (about 2-3 minutes).

Combine the milk, cream, nutmeg and salt in a heavy-bottomed saucepan. Slowly heat on medium until the mixture is hot but not boiling. Stir frequently to keep the bottom from burning.

Next, you’ll need to temper the eggs, to prevent them from scrambling. Slowly add the hot milk (a few drops at a time) to the beaten egg yolks, whisking vigorously.  Continue adding hot milk, a little at a time, until you’ve added half the milk to the egg mixture. Pour the egg mixture back into the saucepan with the rest of the milk. [Go slowly, I’ve scrambled my yolks before adding the milk too quickly. You can increase your speed slightly as you add more milk.]

Cook on medium heat, stirring frequently with a wooden spoon. You’ll want the mixture to reach 16oF degrees, to ensure the eggs are fully cooked. You can check this with a thermometer, although it’s not required. Don’t let the Egg Nog boil.

Remove from the heat and add in the rum. Pour into a glass bowl to cool. Once a bit cooler, place into the refrigerator to chill. Enjoy!

On a side note, above is a picture of a beautiful bouquet my husband created for me [just because he loves me!]. It has fresh wheat and amaranth (pictured), sage, lavendar and rosemary. A perfect bouquet for a chef, no? I’m so lucky!